By Ed Hiatt, Originally Published in the IAMC Newsletter, June 2010
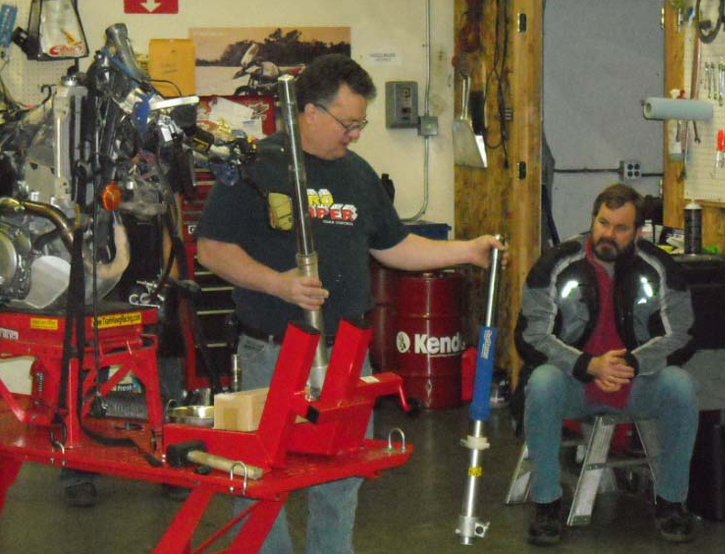
Earlier this year [2010] Ed Hiatt put on a suspension tech-day at Happy Trails in which he reviewed with us the basics of setting up and adjusting your motorcycle suspension to optimize our bike’s performance and make our riding more enjoyable and safer. Here are some of the points he covered. The picture below is courtesy of Chuck Scheer.
Overview
Many assume their new bike is ready to ride as delivered from the factory to the showroom floor. Then, to increase performance most riders focus on adding power, but do little to actually tune their suspension. Motorcycle manufacturers commonly build bikes using a “one size fits all” approach. But you can often significantly transform a bike’s ability to perform, as well as improve safety, by making a few simple adjustments to the suspension and geometry. The springs and geometry are the foundation for a bike’s response to Rider Inputs. Preload compresses the spring before any weight is applied to it. Preload is adjusted to set Sag. Proper Sag setup provides sufficient suspension travel to absorb bumps, with enough travel held in reserve at the top of the stroke to keep the wheels firmly on the ground following a dip, bump, etc. Rebound damping prevents springs from overshooting and oscillating during recovery from bumps. Compression damping assists the springs to absorb braking forces, the impact of bumps, and overshooting during compression. There are many other variables to consider but the Rider is the biggest variable of all. Rider weight, body position, riding style, skill, & where you choose to ride all influence suspension decisions.
The suspension has two primary functions: 1) Smooth out the bumps in the road and keep you comfortable; 2) Keep both tires in constant contact with the road surface to maintain maximum possible traction. Number 1 is nice to have. Number 2 is critical!
So, what should a good suspension setup feel like? There are several things to evaluate. First of all, you don’t want the motorcycle to do anything bad when cornering on rough surfaces, whether on the street, track, or trail. When you are negotiating a curve under rough conditions, are you feeling relaxed and confident or feeling tense waiting for an undesirable effect? Things that normally make riders lose confidence (and traction) are: a) a sharp jarring sensation; b) a loose feel; c) a wobble or weave.
A combination of all these problems is possible. A loose feeling is generally due to inadequate damping forces that allow the motorcycle to wallow and move; thus, making the bike not hold its line on a trail, or arc in a curve. Excessive damping or spring rates in some cases cause harshness, but there are often more instances where an overly soft setup causes the suspension to begin to bottom and feel hard. At the end of the day, predictable traction is what good suspension is all about.
While riding straight and level (not cornering), the rider should also attempt to feel what is going on. The wheels should follow undulations smoothly and the wheel should feel like it is following the surface you are riding on. There should not be sharp jarring sensations coming through to the rider, yet there should be a good feel for the road or trail surface being transmitted.
When a larger bump is encountered, the wheel should move to absorb it without skipping and without much secondary motion. The bike should remain level and stable after the bump has been negotiated. Your suspension should feel like it is moving smoothly, and a rare bottoming of the damper unit or fork is acceptable when encountering extreme conditions. For what good is a suspension’s full travel if you don’t ever use all of it?
In general, a rider looking for touring comfort will look for a softer setup that gives the best isolation from the surface. A rider more interested in off road riding often prefers a firmer feel that allows the motorcycle to make quick transitions with less energy being dissipated by the suspension components. If you find that the shock is bottoming, try increasing damping about 3 clicks. Conversely, if the shock never bottoms when on rough terrain, try reducing damping about 3 clicks. Experiment with the adjustments and take good notes of your original settings, as well as the changes made. How your suspension feels to YOU is what is most important.
Rider Input
One of the very most important factors in a motorcycle’s suspension operation is actually the rider’s input. During acceleration and deceleration, a motorcycle’s weight will transfer backwards and forwards, respectively. On a typical motorcycle, the rider can transfer 150 – 200 pounds of weight from one wheel to another by just changing the throttle positions by a few degrees. For this reason, throttle changes should be made smoothly. Whacking open the throttle will cause the rear suspension to rapidly extend, as well as become less compliant to the surface irregularities (resulting in loss of traction or massive weight transfer).
When applying the front brake, the front suspension WILL compress. The front damping and spring work together to manage these forces. Brake application should be smooth, even when applied rapidly. The correct application of braking forces allows the suspension to transfer the braking energy to the front tire in a way that allows the tire to take a set and conform to the ground where it can develop traction. Snapping on the brake will lead to traction loss. The front compression damping controls the onset of the brake forces while the spring is what will ultimately provide the support and resistance to bottoming while on the brakes. Overall, you should feel a confidence-inspiring and comfortable ride that adds to the total experience.
Acceleration
The rear suspension is strongly affected by the chain forces under acceleration. Hard acceleration will cause the rear of the bike to rise up countering the additional load that is transferred from the acceleration forces. This fact together with the forks’ extension will raise the bike, adding ground clearance. The forces on the rear suspension also cause it to feel firmer under acceleration caused by the application of more throttle. These control facts are a useful tool when cornering or crossing rough terrain!
When a rider rolls on the throttle, they should feel the forks extend smoothly and the rear of the bike should take a set (the rear comes up slightly) in a way that is smooth and confidence inspiring. Rolling off the throttle should cause the rider to feel that same weight transfer reverse in a smooth way, and the rear will add compliance while the front fork should settle back to a neutral position.
Deceleration
Deceleration will lower the front of the bike when entering a corner, as the front wheel gains traction. The steering geometry will become a little quicker as the weight transfers to the front wheel and compresses the fork. This knowledge can also be a great tool for cornering!
When braking, there will be brake dive on any motorcycle with a pro-dive suspension (like the typical telescopic forks). You should be able to feel the front lower during braking but it should be smooth and confidence inspiring, as opposed to the feeling of front end collapse. When braking medium hard (not doing a stoppie) the forks should still offer good feel, as well as some amount of bottoming resistance when encountering bumps.
Springs & Damping
Most springs on a motorcycle are made of steel. A coil spring absorbs and stores energy from a bump as it compresses, and then gives it back as it extends. The amount of energy is specified by the spring rate: how many inches or millimeters the spring will compress under a load in pounds or kilograms. For a given spring, more coils means a softer overall spring rate. If you shorten the spring buy cutting off coils, it becomes stiffer. If the springs are too stiff, the ride can be harsh, and there will be less weight transfer under both acceleration and deceleration. If the springs are too soft, the bike will have a plush feel and bottom out frequently. Even small bumps will use up all the available travel.
The question is, “When are the springs just right?” The optimum is the softest possible spring which bottoms occasionally, but infrequently. The Spring Rate affects how much spring travel is used up by a given bump. A spring can be anything that compresses under a load and expands back when the load is removed. A progressive spring’s resistance rate increases as it is compressed. The air at the top of the forks acts as a special progressive spring to help avoid bottoming out. The oil level must remain high enough to cover the cartridge to avoid starving cartridge valves. Too little oil also reduces the ability of the forks to dissipate heat. So, proper oil level and air content can be very important components of your suspension system. Many riders seem anxious to evacuate air from their forks frequently, when that might actually be the opposite of what’s needed depending upon the application. Consulting a suspension professional is always a good idea.
Springs are great, but they have a problem. If there is inadequate damping, a spring will continue to oscillate until the stored energy is eventually converted to heat. Adding damping to a spring assembly improves suspension performance in several ways. Rebound Damping slows the extension of the compressed spring and converts some of its stored energy into heat by forcing oil through a precisely engineered valve. Rebound damping also helps prevent the spring from over-shooting as it extends. Wallow during cornering or acceleration is a function of inadequate damping. Typically there is more than 2 times the damping force on rebound as on compression. The amount of Rebound Damping can be increased or decreased by adjusting the opening in the needle valve which regulates oil flow by turning a screw (in or out), changing the shims in the valve stack to make it easier or harder for the oil to pass through the rebound valve, and changing the weight of the oil.
Compression Damping helps the spring resist compression and, by forcing oil through a sophisticated valve, converts energy into heat which would otherwise have been stored in the spring to be released later. Compression Damping prevents the spring from overshooting in its movement as the suspension responds to a bump or abrupt braking forces. The amount of Compression Damping can be changed using the same procedure applied to Rebound….adjust the compression needle valve by turning the screw, valve & shim stack design, and oil weight selection. Turning the needle inward constricts oil flow (increasing damping), while backing it out allows oil to flow more freely (reducing damping).
Preload & Sag
Once you have the correct springs for the weight of the bike and rider, dialing in a suspension always starts with Sag. Free Sag is a measure of how far the suspension sinks (compresses) under the weight of the bike alone. Loaded or Rider Sag is a measure of how far it settles under the combined weight of bike and rider. Fuel is in the tank for both measurements. Setting sag focuses on adding just enough Preload to maximize the ability of the springs to keep the wheels in constant contact with the ground.
Adjusting Preload does NOT change the spring rate. Reducing Preload does not make the spring softer, and conversely, adding Preload does not make it stiffer. This is a very common misconception held by many riders. However, adjusting Preload DOES changed how much suspension travel is available to extend the suspension when the bike is unweighted over a bump, the crest of a hill, or anytime it needs to extend to maintain tire contact over a depression. Performance is best when the suspension is normally working within the middle range of its available travel.
Going through the process of setting sag may indicate there is a mismatch between the springs, the rider, and the bike. The springs may be too hard and stiff, or they may be too soft. The following examples may help clarify the relationship between springs, preload, and sag.
1) A heavier rider has a bike coming from the factory with a relatively soft spring. The suspension uses up too much of its travel under just the weight of the rider. It will likely bottom out over a small bump or in light braking….a potentially unsafe condition. To remedy this, substantial Preload is added to the springs in the forks, as well as the shock, until sag is reduced to within the desired range. But it is still a bike with a soft spring for this rider. A little bump and some light braking will still use up a lot of travel. A big bump and hard braking will likely bottom out the suspension. This leaves only the tires to cope with these additional loads and still maintain traction. Leaned hard over in a turn, this rider has little travel left in the suspension to cope with bumps – just when he needs all the help he can get.
2) The opposite extreme is the lighter weight rider who rides a bike equipped with hard, stiff springs. To get enough loaded (Rider) sag, Preload will be backed off until there is almost none at all, or even negative preload in a shock with a threaded collar. When the rider gets off the bike, due to the low preload, Free Sag is more than we want under just the weight of the bike by itself. So what is wrong with that? The problem here will be that while the forks and shock were designed to have a total travel of 4″, the bike may only use half that, or even less, due to the stiff springs. The forces the rider encounters over bumps will be harsh and abrupt, and the ride will not be forgiving. If the spring is actually loose when the handle bars or tail of the bike is lifted, the wheels on the bike will be unweighted over a bump or even the crest of a hill. This topped out suspension is “uncontrolled”. Traction = weight x friction. With no spring pressure available to press the tires against the ground, there is no weight! No weight = no traction. Not good!
Final Thoughts
There is no stock answer to tell us what exactly we need to do in every case. The overall picture in determining the correct spring rate and settings includes a rider’s style and preference, the design of the motorcycle, as well as the nature and condition of the road, track, or trail traversed. Be willing to experiment and HAVE A TEST STRATEGY.
Begin your suspension experience with one possibility in mind: Things may seem pretty good as they already are, but they might be made better. Sometimes much better! If you already have a perceived handling problem, then you have a reason to experiment with some changes. If you don’t, then you still have a reason to experiment.
This was the situation for me regarding my WRR. I liked the suspension. In fact I thought it was the best stock suspension that I’ve ever had on a true dualsport motorcycle (not a plated race bike). But there were a few nagging issues for me….my style….and where I like to ride. I began experimenting to isolate the best settings for me. The process was very valuable as it helped me identify the specific things I wanted my suspension to both do and not do. Then I discovered that I still desired something more….something beyond the adjustment range of the stock components. So, I consulted a real suspension professional. The changes he made were relatively simple, yet VERY effective. Now, it does everything I want (or could reasonably expect) a dualsport bike to do. Anyway, I’m just thrilled with the results. In my next article, I’ll share more details about the changes we made to my WRR suspension.
The above article comes from a Dualsport motorcycle web site the author did a much better job explaining it than I can. I hope you have enjoyed and will put it to good use. (Ed Hiatt)